
Is .NET Core cool enough to cool a Raspberry Pi? - Part 2
24 Apr 2020In the last post, I mainly described how to set up the software for the Raspberry Pi Fan Controller. In this part, I will focus on the hardware part and bringing everything together.
Bring it all together
During the development, I could easily test my app by using the Inverse of Control pattern and utilizing Dependency Injection to inject a fake temperature provider and fan controller. At a certain point, I was ready to test it on the Raspi.
At first, I was convinced to deploy the app via Docker. But after some time, I was not sure whether a sudo command executed from within a Docker container will be forwarded to the OS (remember the temperature measurement). So I decided to ship it as a self-contained executable. This can be done as follows:
dotnet publish -r linux-arm -c Release /p:PublishSingleFile=trueThe following command copies the build results to the Raspi:
scp -r \bin\Release\netcoreapp3.1\linux-arm\publish pi@raspberry:/tmp/RaspiFanController/On the Raspi, we have to allow the app to be executed:
chmod 777 /tmp/RaspiFanController/RaspiFanControllerAnd finally, start the app using sudo. This is important because otherwise, reading the temperature doesn’t work.
sudo /tmp/RaspiFanController/RaspiFanControllerThere were some firewall/reverse proxy issues in my case, but that would be beyond this post. In the end, I could successfully access the app via http://raspberry:5000/cool and it was showing the current temperature.
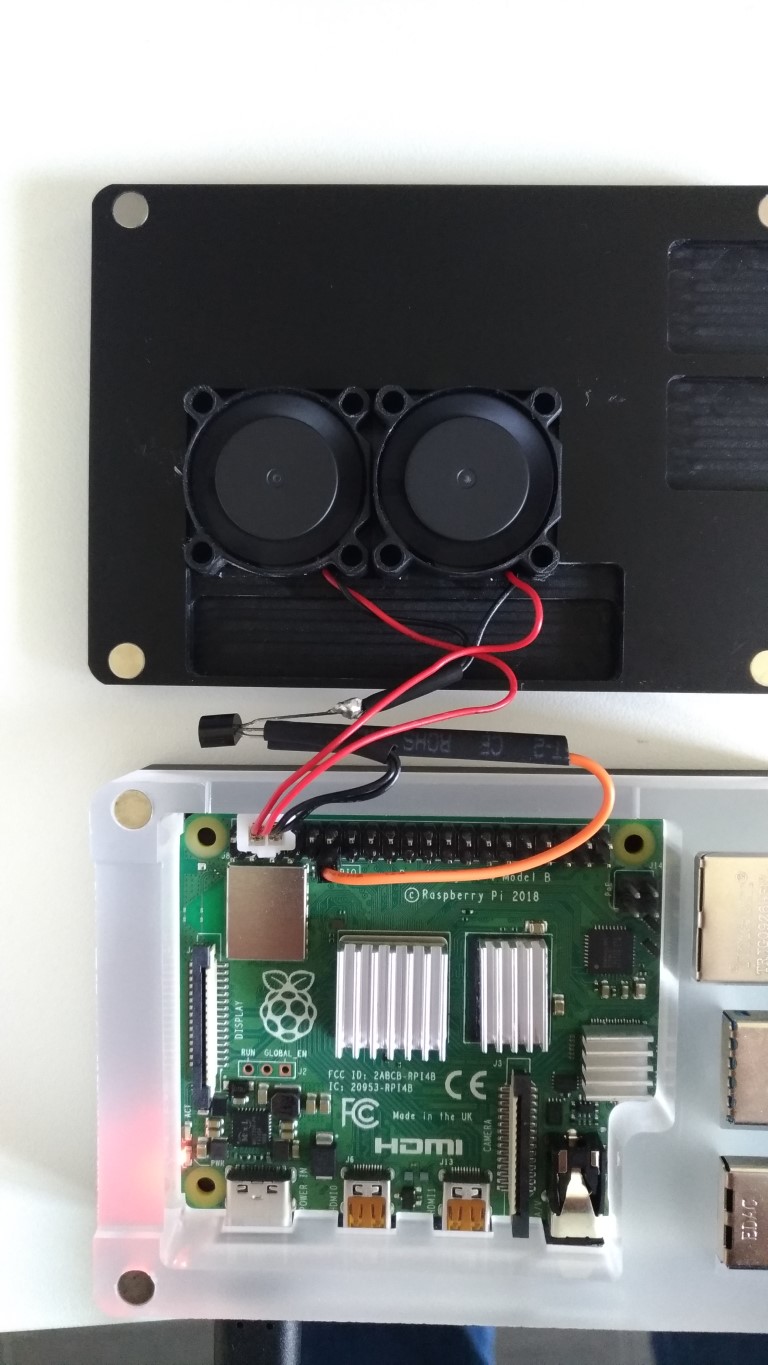
Soldering
This was definitely the hardest part for me in this project. But several other blog posts like the following gave me the necessary information which components I had to buy and how to connect them:
- Automatically Control Your Raspberry Pi Fan (and Temperature) with Python
- Temperature Controlled Fan for Raspberry Pi 4
Finally, I bought:
- Breadboard
- Red LED
- Transistor BC 337
- Resistor 680 Ω for the Transistor
- Resistor 1 kΩ for the LED
- Jumper wires
Because I was afraid to somehow destroy the fan, I made a first test with my controller software and the LED:

After a successful test, I switched over and used the fan:
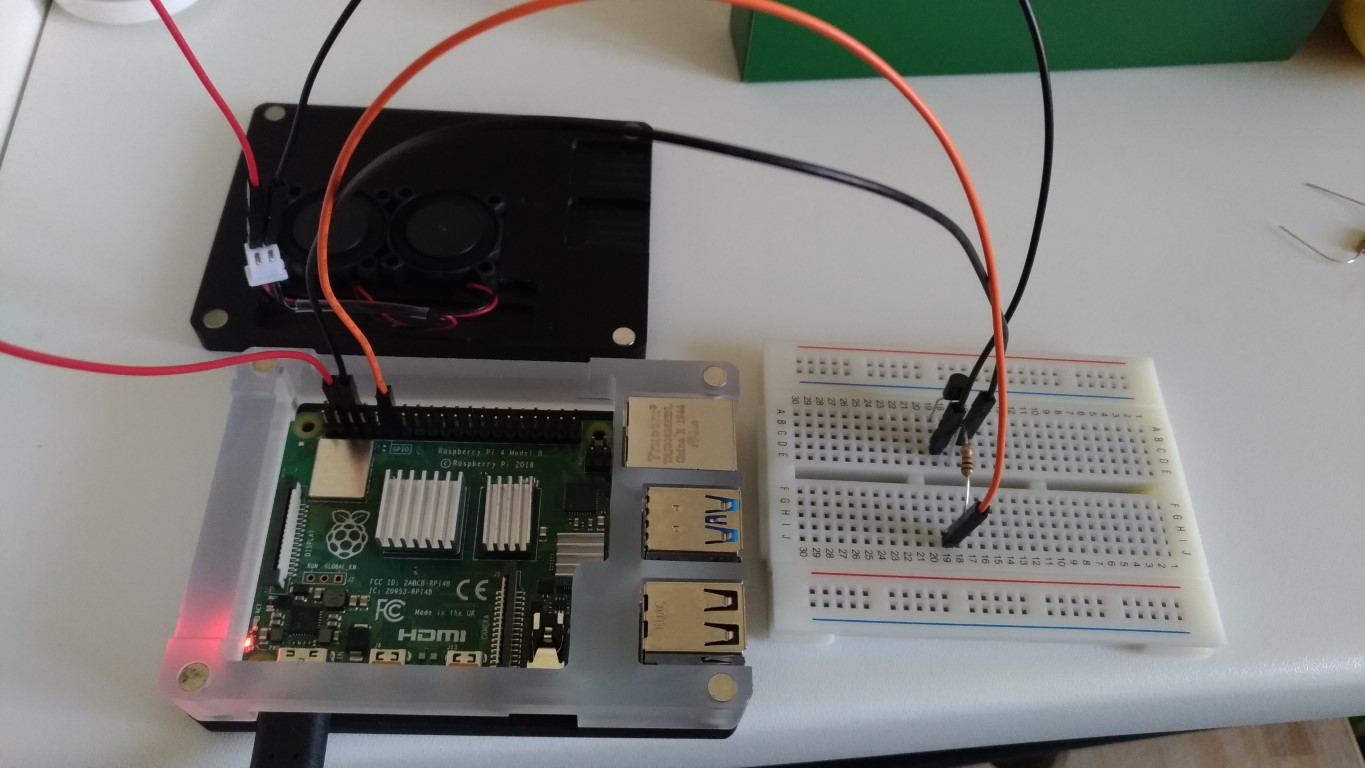
And it was working! So I had no more excuses to solder everything and do the final assembly:
Register the app as a service
Now that everything was working fine, I wanted to register my little app as a service. This will ensure that the controller automatically gets started after a reboot.
For this, I had to create a service unit configuration file on the Raspi:
sudo nano /etc/systemd/system/RaspiFanController.serviceIt has the following content:
[Unit]
Description=Raspberry Pi Fan Controller based on Blazor Server

[Service]
WorkingDirectory=/tmp/RaspiFanController
ExecStart=/tmp/RaspiFanController/RaspiFanController &
Restart=always
# Restart service after 10 seconds if the dotnet service crashes:
RestartSec=10
SyslogIdentifier=raspifancontroller
User=root
Environment=ASPNETCORE_ENVIRONMENT=Production

[Install]
WantedBy=multi-user.target
With the following commands, the service will be created:
sudo cp RaspiFanController.service /etc/systemd/system/RaspiFanController.service
sudo systemctl daemon-reload
sudo systemctl start RaspiFanController
Now the app will start on every reboot.
Summary
Because of recent developments in the .NET ecosystem, I was able to write a controller for a Linux device like a Raspberry Pi. I could leverage all the new features my favorite platform provides:
- Cross-platform
- Worker Services
- ASP.NET Core Blazor Server
In theory, this app could be easily ported to any other OS like Windows 10 IoT Core or device like Arduino - if the necessary parts like temperature retrieval are available.
For me, this was another great experience of how the modern development world can look like: serve every platform with the tools of your choice.
Thank you for reading!
